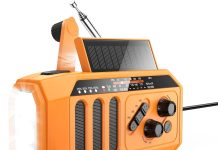
Imagine this scenario: you find yourself stranded on a deserted road with a dead car battery, no sign of civilization in sight. Panic starts to set in, but then you remember that you have an emergency radio stashed away in your glove compartment. Relief washes over you, but wait – how do you power it up if your car’s battery is dead? Fear not! In this article, we will share with you a simple and effective solution to keep your emergency radio running even when your car’s battery fails you.
Review contents
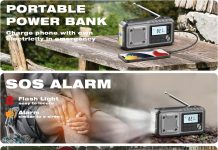
Using a Portable Power Bank
Choose a high-capacity power bank
When it comes to powering your emergency radio in a car, a portable power bank can be a convenient and reliable option. It is essential to choose a high-capacity power bank to ensure that it can provide enough power to keep your radio running for an extended period. Look for power banks with a large mAh (milliampere-hour) rating, as this indicates the amount of energy it can store. Consider factors such as the size, weight, and portability of the power bank to make your selection.
Ensure the power bank has a car jump starter function
To make the most of your portable power bank, it is beneficial to choose one that includes a car jump starter function. This function adds an additional layer of versatility to your power bank, as it can also jump-start your car’s battery in case of emergencies. By having a power bank with this capability, you can double its usefulness and ensure that you have a reliable source of power for both your emergency radio and your vehicle.
Connect the emergency radio to the power bank using a USB cable
Once you have selected a suitable power bank, it is time to connect your emergency radio to it. Most portable power banks have USB ports, making it easy to connect your radio using a compatible USB cable. Ensure that the cable is in good condition and securely connect one end to the USB port on the power bank and the other to the emergency radio’s charging port. This connection will allow the power bank to provide a steady supply of electricity to keep your radio powered on.
Charge the power bank before use
Before relying on your power bank to power your emergency radio, it is crucial to charge it fully. Most power banks come with a built-in rechargeable battery, which you’ll need to charge before using. Connect the power bank to a power source using the included charging cable and leave it to charge until the battery level indicator shows that it is full. By charging the power bank beforehand, you can be confident that it has enough stored power to keep your radio operational when you need it most.
Position the power bank securely in the car
To ensure safety and ease of use, it is important to position the power bank securely within your car. Choose a stable location, such as the center console or glove compartment, where the power bank will not move around while you are driving. Secure the power bank in place using non-slip padding or straps to prevent any accidents or damage. By positioning the power bank securely, you can access it easily and minimize the risk of it falling or causing any disruptions while on the road.
Check the power bank’s remaining battery level periodically
To avoid any unpleasant surprises, it is essential to periodically check the power bank’s remaining battery level. Most power banks are equipped with battery level indicators, displaying the current charge status. By keeping an eye on this indicator, you can track the power bank’s energy consumption and anticipate when it may need to be recharged. Regularly checking the battery level will help ensure that you have a reliable power source for your emergency radio throughout your journey.
Using a Car Charger
Obtain a suitable car charger for your emergency radio
If you find yourself in a situation where your car’s battery is dead, a car charger can be a useful alternative to power your emergency radio. When choosing a car charger, make sure it is compatible with your emergency radio. Look for car chargers that offer the appropriate voltage and charging capacity for your specific radio model. It is also advisable to opt for a car charger with additional features such as overcharging protection to safeguard both your radio and car’s electrical system.
Locate the car’s cigarette lighter or power outlet
To use a car charger, you need to locate your car’s cigarette lighter or power outlet. In most vehicles, the cigarette lighter or power outlet is situated on the dashboard, near the center console, or in the rear passenger area. Once you have identified the location, clear any debris or objects obstructing the outlet to ensure a secure connection. Inspect the outlet for any signs of damage or corrosion that could affect the charging process or cause electrical issues.
Insert the car charger into the cigarette lighter/power outlet
With the car’s cigarette lighter or power outlet in sight, it’s time to insert the car charger. Firmly insert the car charger’s connector into the cigarette lighter or power outlet until it fits snugly. Ensure that the connection is secure, as a loose connection can result in intermittent charging or a complete loss of power. Give the charger a gentle wiggle or tug to confirm that it is properly locked in place.
Connect the emergency radio to the car charger
Once the car charger is securely inserted, it’s time to connect your emergency radio. Most car chargers have a USB port, allowing you to connect your radio using a compatible USB cable. Plug one end of the USB cable into the car charger’s USB port and the other end into the emergency radio’s charging port. Ensure that both connections are secure and free from any debris, as obstructions can interfere with the charging process.
Start the car’s engine to provide power
To activate the car charger and start charging your emergency radio, you need to start the car’s engine. Turn the ignition key or press the start button to initiate the engine. As the engine runs, the car’s electrical system will provide power to the car charger, which will in turn charge your emergency radio. Keep in mind that if your car’s battery is completely dead, you may need to jump-start it using jumper cables or another power source before the car charger can function.
Monitor the radio’s battery usage to avoid draining the car’s battery
While using a car charger to power your emergency radio, it is important to monitor the radio’s battery usage to avoid draining the car’s battery. Car batteries have a limited capacity, and excessive power consumption from the radio can lead to a dead car battery. Keep an eye on the radio’s battery level indicator or any warnings that indicate low battery. If necessary, reduce the radio’s power consumption by adjusting settings such as screen brightness or volume to preserve the car’s battery life.
Using a Portable Generator
Select a portable generator with sufficient power output
When it comes to powering your emergency radio using a portable generator, selecting the right generator is crucial. Choose a portable generator with sufficient power output to meet the energy requirements of your radio. Consider factors such as the generator’s wattage, fuel efficiency, noise level, and portability. Opt for a generator with clean power output to ensure stable and interference-free electricity for your radio. Assess your specific needs and choose a generator that best fits your requirements.
Position the generator outside the car exhaust gas
To ensure safe operation, it is important to position the generator outside the car exhaust gas. Generators emit carbon monoxide gas, which is highly toxic and can be fatal if inhaled in high concentrations. Place the generator at a safe distance from the vehicle, typically at least 20 feet away, to prevent the exhaust gas from entering the car’s cabin. This distance will minimize the risk of carbon monoxide poisoning and ensure the safety of everyone inside the vehicle.
Connect the emergency radio to the generator using an appropriate power cord
After positioning the generator safely, it’s time to connect your emergency radio. Ensure you have an appropriate power cord that matches the generator’s outlet and the radio’s charging port. If needed, use adapters or extension cords to establish a secure and proper connection. Inspect the power cord for any signs of damage or wear that could pose a risk or affect the charging process. Connect one end of the power cord to the generator’s outlet and the other end to the emergency radio.
Start the generator and check for proper electrical supply
Before powering on your emergency radio, start the generator and check for proper electrical supply. Follow the manufacturer’s instructions for starting the generator, including any safety precautions. Once the generator is running, verify that it is supplying electricity to your radio. Check for any indicators or voltage readings on the generator or the radio itself to ensure that the electrical supply is stable and sufficient for the radio’s operation.
Adjust the generator’s settings for optimal power delivery
To optimize the power delivery to your emergency radio, consider adjusting the generator’s settings. Some generators offer options for controlling the voltage or frequency output, allowing you to fine-tune the power delivery. Consult the generator’s manual or contact the manufacturer for guidance on the recommended settings for powering electronic devices such as radios. Adjusting these settings can help ensure that your emergency radio receives a clean and steady power supply.
Ensure proper ventilation during generator operation
While using a portable generator to power your emergency radio, it is important to ensure proper ventilation. Generators produce heat and exhaust gases during operation, and proper ventilation is necessary to dissipate the heat and redirect the exhaust fumes safely away from the generator and the vehicle. Operate the generator outdoors or in a well-ventilated area to prevent the accumulation of dangerous gases. Avoid operating the generator in enclosed spaces or near open windows to minimize the risk of carbon monoxide poisoning.
Using Jumper Cables
Prepare a functioning car with a charged battery
When your car’s battery is dead, using jumper cables can be an effective way to power your emergency radio. Start by locating a functioning car with a charged battery to serve as a power source. Ensure that the functioning car’s battery is in good condition and has enough charge to transfer to the dead battery. It’s important to select a vehicle that is compatible with your car and has a similar battery voltage (typically 12 volts) to ensure a safe and successful jump start.
Position the cars close enough for jumper cable connection
To connect the jumper cables properly, position the functioning car and the car with the dead battery close enough to reach each other with the cables. Ideally, place the cars parallel to each other, with the front ends facing each other. Ensure there is no physical contact between the vehicles and sufficient space to maneuver during the jump-start process. Additionally, engage the parking brakes on both vehicles to prevent them from accidentally rolling during the jump-start procedure.
Connect the positive terminals of both car batteries with a jumper cable
Before connecting the jumper cables, identify the positive (+) and negative (-) terminals on both car batteries. The positive terminal is usually marked with a “+” symbol or is larger than the negative terminal. With the functioning car turned off, connect one end of the positive jumper cable (usually red) to the positive terminal of the functioning car’s battery. Then, connect the other end of the same cable to the positive terminal of the dead battery, ensuring a secure connection.
Connect the negative terminal of the charged battery to a ground point on the dead battery car
To complete the jumper cable connection, locate a suitable ground point on the car with the dead battery. Look for an unpainted metal surface away from the battery and any moving parts. Connect one end of the negative jumper cable (usually black) to the negative terminal of the functioning car’s battery. Then, connect the other end of the negative cable to the chosen ground point on the car with the dead battery. This connection grounds the circuit and helps prevent electrical damage.
Start the functioning car’s engine and allow it to run for a few minutes
After both ends of the jumper cables are securely connected, start the engine of the functioning car. Allow the engine to run for a few minutes to transfer power to the dead battery and recharge it. This process enables the dead battery to regain enough charge to power your emergency radio. While the engine is running, avoid revving the engine excessively or keeping it at high RPM, as it can cause voltage spikes that may damage the electrical system of the car with the dead battery.
Attempt to start the car with the dead battery
Once the functioning car’s engine has been running for a few minutes, attempt to start the car with the dead battery. Turn the ignition key or press the start button to initiate the starting process. If the dead battery still has some charge left, this jump-start procedure should provide enough power to start the vehicle. If successful, allow the engine to run for a while to recharge the dead battery further. If the car still does not start, repeat the jump-start process or seek professional assistance.
Connect the emergency radio to the functioning car’s power outlet or cigarette lighter
With the car successfully jump-started, it’s time to power your emergency radio using the functioning car’s electrical system. Connect your radio to the functioning car’s power outlet or cigarette lighter using a compatible power cord. Ensure that the connection is secure and free from any obstructions. By accessing the functioning car’s power outlet, you can take advantage of its power supply to keep your emergency radio running and maintain communication during your journey.
Using a Power Inverter
Obtain a power inverter suitable for your emergency radio
If you prefer using your emergency radio’s AC adapter and don’t have access to a traditional power source, a power inverter can solve your power supply needs. Ensure you acquire a power inverter that is suitable for your emergency radio’s power requirements. Pay attention to the inverter’s wattage rating, as it determines the maximum power it can deliver. Choose an inverter that exceeds your radio’s power consumption to ensure a stable and reliable power source.
Position the power inverter within reach of the car’s power outlet or cigarette lighter
To use a power inverter, position it within reach of your car’s power outlet or cigarette lighter. Consider factors such as cable length and comfort when choosing the position. Placing the inverter near the front console or dashboard is often convenient, as it offers easy access and minimizes cable clutter. Ensure that the inverter is secure and stable, minimizing any risk of movement or damage while the vehicle is in motion.
Connect the power inverter to the car’s power outlet or cigarette lighter
With the power inverter in a suitable location, connect it to the car’s power outlet or cigarette lighter. Insert the inverter’s plug into the outlet or lighter until it fits securely. Give it a gentle tug or wiggle to ensure a proper connection. Some power inverters come with additional connectors or terminal clamps for a direct connection to the car’s battery. Follow the manufacturer’s instructions if you choose this connection method.
Plug in the emergency radio’s AC adapter into the power inverter
To power your emergency radio using the inverter, plug its AC adapter into the inverter’s AC outlet. Ensure a secure and clean connection by aligning the adapter’s plug correctly and pushing it in until it fits snugly. Verify that the connection is stable by gently pulling on the plug. Make sure the inverter is switched on and ready to convert the car’s DC power to AC power for your radio.
Start the car’s engine to provide power to the inverter
To activate the power inverter and enable it to deliver AC power, start your car’s engine. The running engine provides the necessary DC power to the inverter, which then converts it into AC power suitable for your emergency radio. Keep in mind that some vehicles have a time limit for powering electrical accessories when the engine is not running, so ensure the engine remains on to maintain a stable power supply to the inverter.
Monitor the inverter’s power usage to avoid draining the car’s battery
When using a power inverter, it is crucial to monitor its power usage to avoid draining your car’s battery. Power inverters draw power from the car’s battery to generate AC power, and excessive power consumption can deplete the battery. Some power inverters feature built-in voltage meters or indicators that display the battery’s voltage. Be mindful of these indicators and consider reducing the radio’s power consumption as needed to preserve the car’s battery life.


